

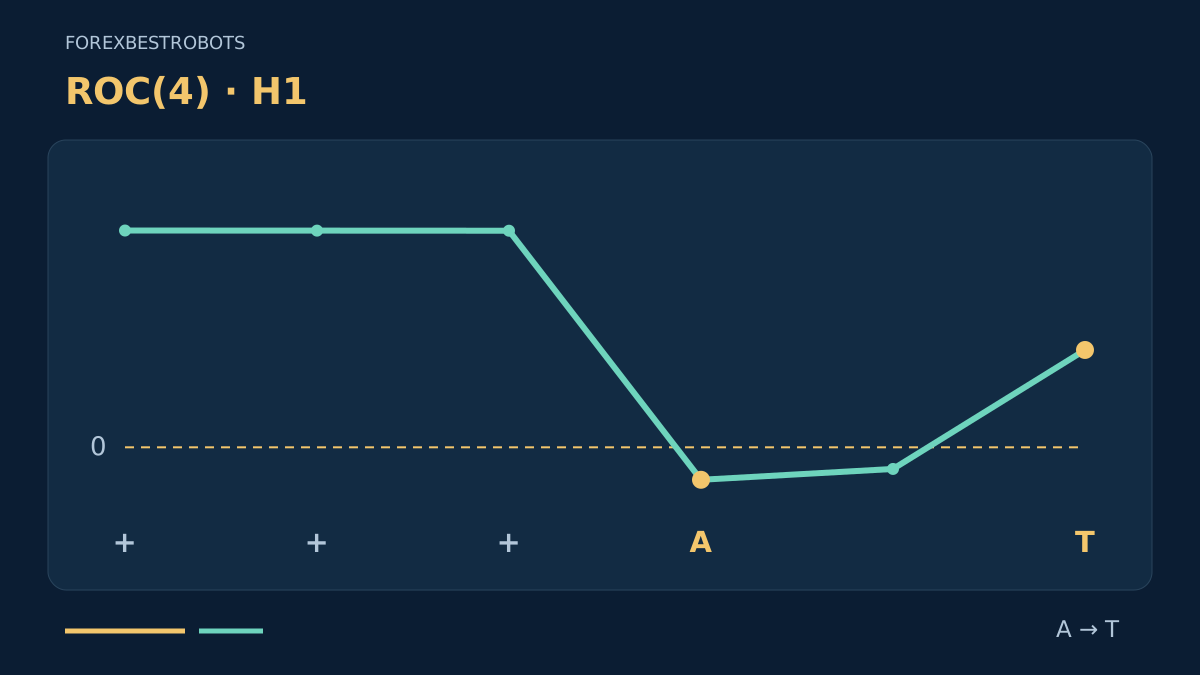
Momentum can pause without ending the preceding move. This educational continuation model looks for a brief reset in the percentage Rate of Change, or ROC, followed by renewed directional movement and a completed price break. The reset, deadline and first eligible trigger are fixed before any entry quote is considered.
Here “continuation” means resuming the preceding short momentum leg; it does not establish a higher-timeframe trend or predict another advance. The RSI failure swing strategy addresses a different reversal hypothesis. Neither specification has demonstrated a profitable edge merely because its rules can be reproduced.
1. Fix the baseline and its limits
Use EURUSD, H1, Bid candles and ROC(4) on Close. All decisions use completed bars. The short period, 3-bar prior leg, 4-bar recovery window and limits below are explicit teaching choices, not optimized settings or live-trading recommendations.
Run only one episode per symbol while flat. Ignore new patterns while a position is open. Cancellation, expiry or a consumed trigger cannot start another episode on that same bar; wait for a later qualifying reset. A new episode must independently satisfy the full prior-leg condition.
Missing required OHLC or indicator observations cancel an active episode. Do not substitute zero, bridge a missing bar or reconstruct a reset from a later chart. The baseline adds no moving average, divergence, session or calendar filter. Any such addition creates a different version to validate.
2. Keep ROC zero separate from MT4 Momentum 100
Define ROC(n) = 100 × (Close(t) / Close(t−n) − 1). It measures the percentage close-to-close change over the lookback. The built-in MT4 Momentum uses 100 × Close(t) / Close(t−n), so with the same period and Close input, ROC = Momentum − 100.
Consequently, ROC's zero line corresponds to Momentum's 100 line. A positive reading says the latest close exceeds its comparison close; it does not measure buying volume or guarantee a persistent trend. Skip invalid or nonpositive price inputs before division. Compare full precision, not rounded labels.
ROC can turn positive because an older, higher comparison price leaves the window, even while the latest close falls. The frozen price break below adds an observable requirement, but both tests derive from price and are not independent evidence. The momentum-indicator guide explains the underlying measurements.
3. Arm BUY at the first qualifying reset
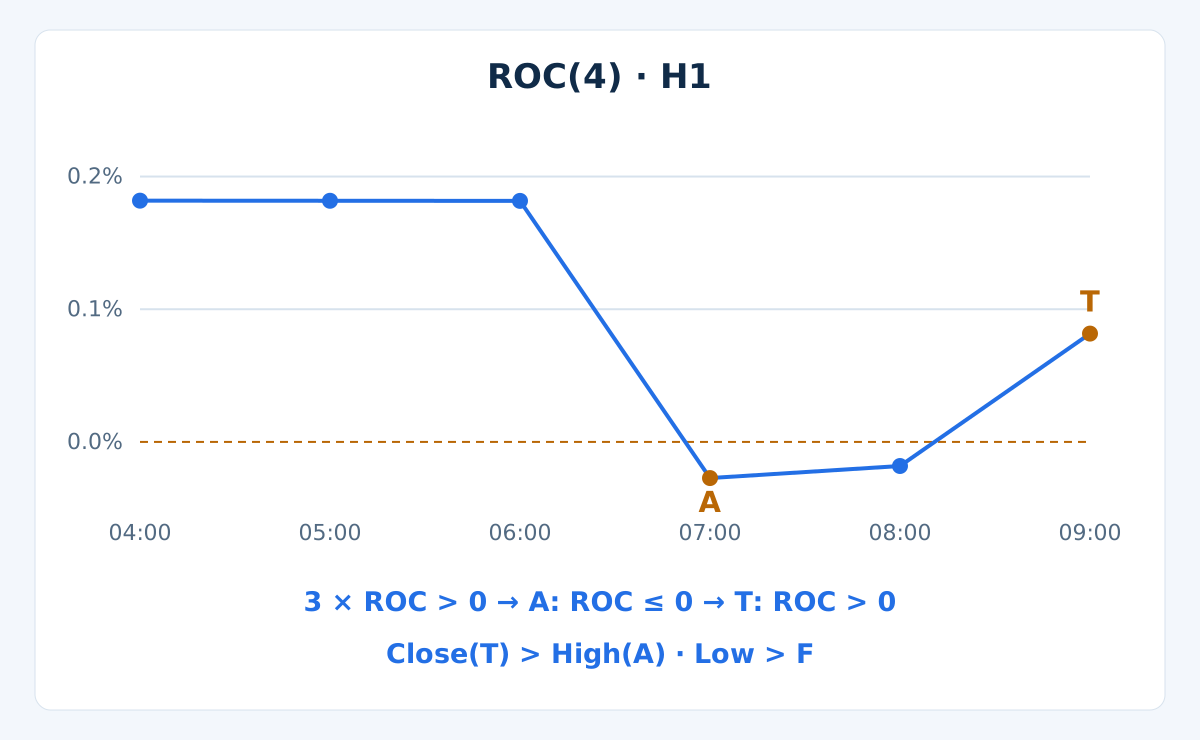
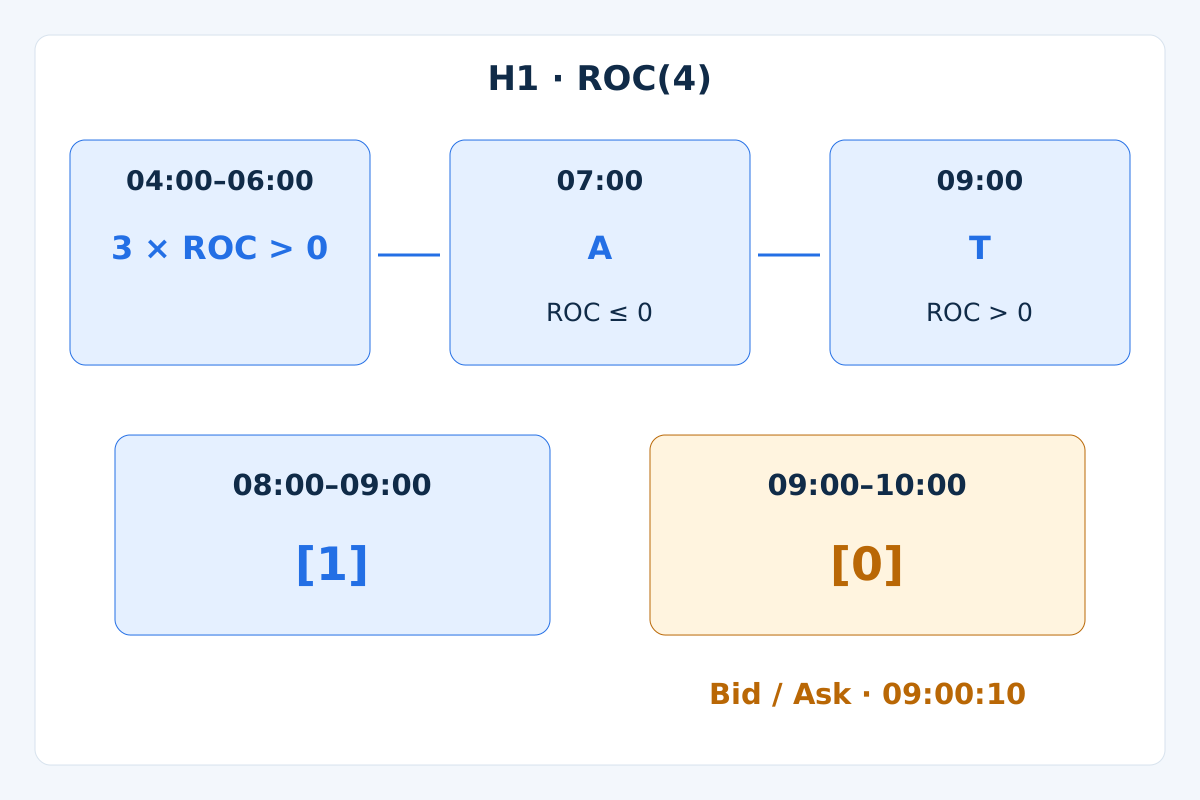
On completed bar A, require the immediately preceding 3 ROC readings to be strictly positive and the current reading to be ≤ 0. A reading exactly zero qualifies. This ends the measured positive leg and arms a BUY episode; it does not authorize an order.
At A's close, freeze its Bid high High(A) and the invalidation floor F = Low(A) − 1 pip. Do not move either level as later candles arrive. The episode starts after A closes; its own low does not invalidate the newly defined floor.
Inspect only the next 4 completed H1 bars, including the fourth. During this wait, a later Bid low ≤ F cancels the episode, even if the same candle eventually closes strongly. Check this invalidation before testing a trigger. Further nonpositive ROC readings do not restart the clock.
4. Use the first positive recross once
The first later completed bar with ROC > 0 is the only trigger candidate T. Require Close(T) > High(A) on that same candle, after checking the floor. Price equality fails. A zero ROC reading remains a waiting condition and cannot trigger BUY.
If that first positive reading lacks the price break, cancel permanently. A later break cannot revive the episode. If no positive reading appears by the fourth eligible close, expire. The fourth bar can still trigger when all conditions pass; invalidation takes priority on every bar.
There is no pending order at the frozen high and no intrabar oscillator entry. The candidate becomes knowable only at T's close. At the next bar, T is shift 1 and the forming bar is shift 0. Keep analytical confirmation separate from an executable market quote.
5. Freeze BUY exits before inspecting the quote
The planned BUY SL is the already fixed Bid floor F. At T's close, set TP = Close(T) + 2 × (Close(T) − F). Keep both prices fixed through quote assessment. Reanchoring the target to rescue a late entry changes the model.
Exit the entire position at the first SL or TP execution. Otherwise request a market exit at the first available quote after 8 H1 bars following T have completed. There is no trailing stop, partial exit, averaging down or exit on a later ROC recross.
The target is a geometric rule, not a forecast. Gaps, unavailable quotes and slippage can produce a worse exit than the planned stop. If a nearby barrier makes this specification unattractive, skip it or define and test a separate filter; do not silently alter the baseline.
6. Define SELL with the correct price sides
- Arm A when the preceding
3ROC readings are strictly negative and the current reading is≥ 0. FreezeLow(A)and the Bid invalidation ceilingU = High(A) + 1 pip. Equality at zero qualifies as a reset. - In the next
4completed bars, cancel on any Bid high≥ Ubefore testing the trigger. The firstROC < 0must coincide withClose(T) < Low(A). Equality or a failed first price break cancels; no later revival is allowed. The same deadline and bar-reuse rules apply. - SELL exits trigger on Ask. Set
SL = High(A) + 3 pips: the1-pip structural buffer plus a2-pip spread allowance. At T's close, fix the Ask target asTP = Close(T) − 2 × (SL − Close(T)). Use the same full-position and time exits.
The Bid invalidation ceiling and the Ask SL serve different stages. The spread allowance is not a reconstruction of historical Ask highs; wider future spreads can trigger SELL SL earlier. Test with relevant Bid/Ask data rather than assuming the two sides are identical.
7. Apply execution and portfolio gates
After T closes, assess the first fresh quote with ready data, within 60 seconds of that close. BUY enters at Ask; SELL at Bid. Require positive prices with Ask ≥ Bid and spread ≤ 2 pips. BUY needs SL < Bid and Ask < TP; SELL needs TP < Bid and Ask < SL. No timely quote means no trade.
Require estimated net reward divided by planned stop loss ≥ 1.5. Use the actual price sides, round-turn commission and adverse allowances of 1 pip at entry and 1 pip at exit in both estimates. Spread is already represented by Bid/Ask prices; do not charge it twice. A failed first quote consumes the episode.
Budget at most 0.5% of current equity for the new trade and at most 1% combined planned stop risk across the portfolio. Derive loss per lot in the account currency, then round volume down to the broker's step. Skip if minimum volume, margin, trading permissions or stop distances fail. Correlated positions share the aggregate budget.
These are planned limits, not bounds on actual loss. Validate tick size, tick value and contract terms for the symbol. Keep pips distinct from broker points; on a 5-decimal EURUSD quote, 1 pip is 10 points. The risk-management guide covers the wider sizing process.
8. Reproduce the synthetic sequence
The invented Bid candles below use one assumed server clock and labels at bar close. The first Open equals its Close; later Opens equal the preceding Close. High is the larger of Open and Close plus 0.00020; Low is the smaller minus 0.00020. This is an arithmetic illustration, not historical evidence or a backtest.
| H1 close time | Bid close | ROC(4), % | MT4 Momentum(4) |
|---|---|---|---|
00:00 | 1.10000 | — | — |
01:00 | 1.10050 | — | — |
02:00 | 1.10100 | — | — |
03:00 | 1.10150 | — | — |
04:00 | 1.10200 | 0.181818 | 100.181818 |
05:00 | 1.10250 | 0.181736 | 100.181736 |
06:00 | 1.10300 | 0.181653 | 100.181653 |
07:00 | 1.10120 | -0.027236 | 99.972764 |
08:00 | 1.10180 | -0.018149 | 99.981851 |
09:00 | 1.10340 | 0.081633 | 100.081633 |
The readings at 04:00, 05:00 and 06:00 are positive. At A, 07:00, ROC becomes −0.027236%. Freeze High(A) = 1.10320, Low(A) = 1.10100 and F = 1.10090. The low at 08:00 remains above F; its ROC is still nonpositive.
At T, 09:00, ROC is 0.081633% and the Bid close is 1.10340, strictly above the frozen high. No intervening low touched F. The first positive recross therefore passes the price test within the window. The displayed indicator values use 6 decimals; decisions use unrounded calculations.
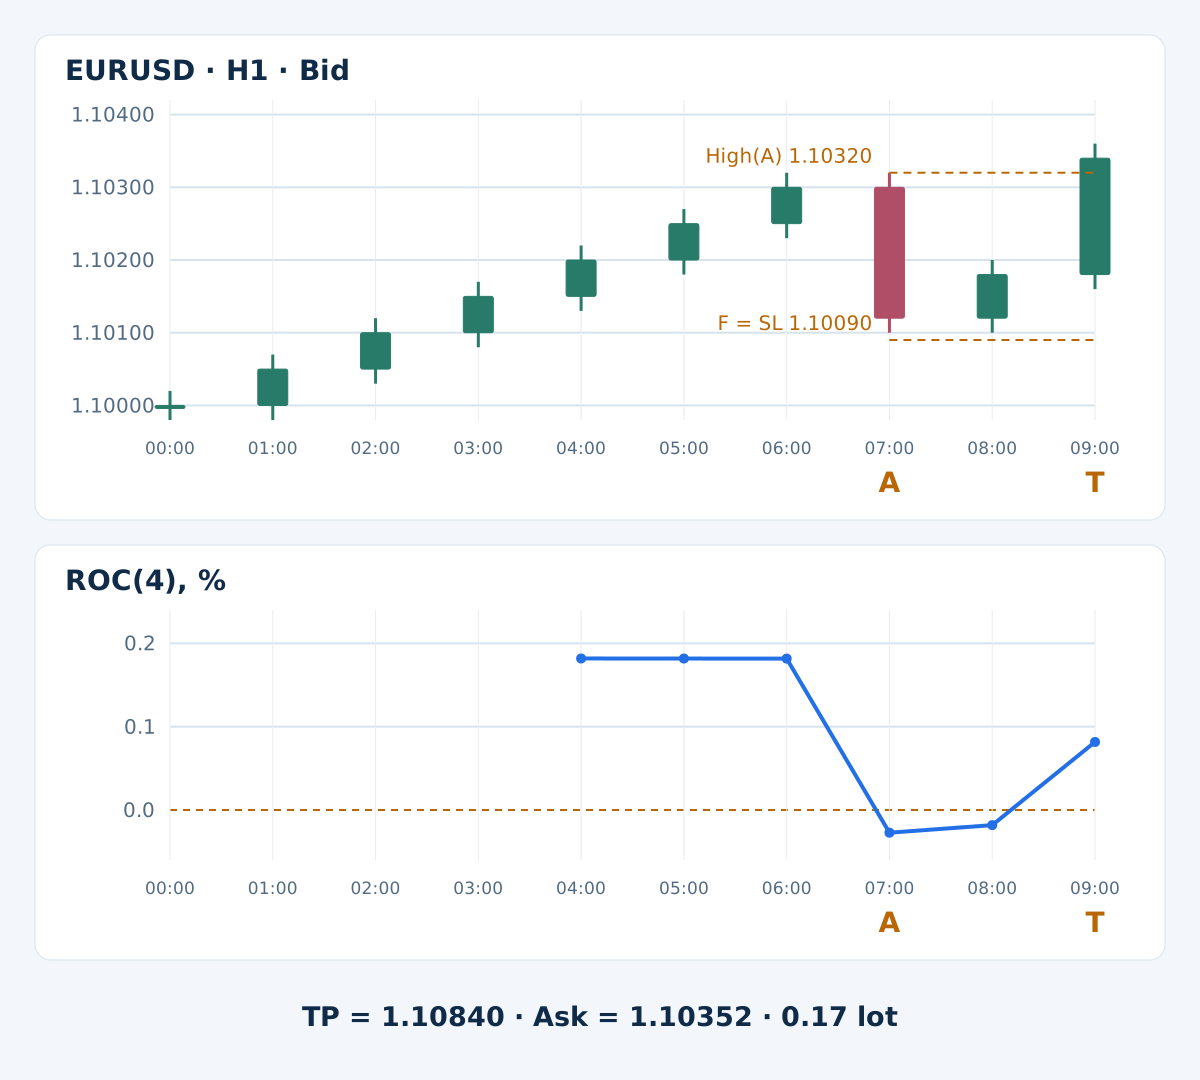
BUY SL is 1.10090 and TP is 1.10840. Assess a quote only after the bar ending 09:00 closes. If filled and neither price exit occurs, the time exit becomes due at 17:00. No later price path, fill confirmation or exit outcome is supplied.
9. Calculate costs before choosing volume
Assume a USD account with $10,000 equity, 100,000 EUR per lot, 1 pip equal to 0.0001, pip value $10 per lot and a 0.01 volume step. The first ready quote at 09:00:10 is Bid 1.10340 / Ask 1.10352: spread 1.2 pips. Assume $7 round-turn commission per lot, no financing charge in this example, and the stated adverse allowances.
| Check | Calculation | Result |
|---|---|---|
| Risk budget | 10,000 × 0.005 | $50 |
| Estimated loss per lot including costs | (26.2 + 1 + 1) × 10 + 7 | $289 |
| Potential reward per lot after costs | (48.8 − 1 − 1) × 10 − 7 | $461 |
| Net reward / planned loss | 461 / 289 | 1.595156 |
| Volume rounded down to the step | floor((50 / 289) / 0.01) × 0.01 | 0.17 |
| Planned stop loss at that volume | 0.17 × 289 | $49.13 |
The illustrative quote passes the ratio gate. A hypothetical Ask of 1.10380 gives loss $317 and potential reward $433 per lot: 433 / 317 = 1.365931, below 1.5. Reject it; do not enlarge the target or wait for a better quote from this episode.
The 0.17-lot calculation assumes enough remaining portfolio risk and valid broker conditions. Allowances estimate adverse execution; they do not guarantee a maximum loss or a fill at the displayed price. A different account currency or contract requires a fresh loss-per-lot calculation.
10. Retain failures and missed trades
- A nonpositive reset without three preceding positive readings: no BUY episode.
- The first positive recross without a same-candle price break: permanent rejection.
- A touched invalidation level, missing observation or expired window: no entry.
- A late quote, excessive spread, inadequate net ratio or failed risk gate: consume the trigger and skip.
Choppy markets can produce repeated resets and false price breaks. A short lookback also changes its comparison close rapidly. Strong scheduled or unexpected news, rollover and gaps can overwhelm the illustrated spread and slippage assumptions. Log these regimes rather than deleting their losses after seeing results.
The baseline contains no session or news exclusion. Introduce one only as a separately specified version, with its own missed-trade count and validation. An oscillator and a close above the reset high remain related price transformations; more conditions alone do not establish better expectancy. The momentum-combination guide discusses this dependence.
11. Preserve chronology in an EA and in testing
Store symbol, timeframe, rule version and A's opening timestamp as the episode identifier. Persist the frozen levels, deadline and consumed status. Process each closed bar once. Distinguish the trigger, order request and confirmed position. This article specifies a model; it is not tested EA source code.
After an uncertain order response or restart, reconcile open orders and history before another request. A timeout does not prove that no order exists. A known rejection gets no retry in the same episode. Record excessive slippage and actual exposure; never widen SL or increase volume to disguise an execution breach.
First verify the ROC/Momentum conversion, strict comparisons, zero equality, deadline and invalidation priority with a chronological log. Test SELL with Ask exits separately. Then evaluate the full hypothesis using broker-relevant quotes, commissions, financing and adverse fills. If both exits occur inside one OHLC bar, use tick order or flag ambiguity and report a conservative SL-first assumption.
Separate development from later evaluation, retain all tried variants, and report net returns with drawdown, exposure, trade counts and uncertainty. Forward validation uses incoming data; it cannot guarantee live results. The MT4 backtesting guide explains the broader process. No win rate or return has been established here.
12. ROC continuation questions
Is ROC's zero line the same as MT4 Momentum's zero line?
No. With the same Close input and period, ROC equals Momentum minus 100. ROC zero therefore corresponds to Momentum 100. Comparing the raw MT4 value with zero would change the strategy completely.
Does a reset at exactly zero qualify?
Yes. BUY arms after 3 strictly positive readings when ROC is ≤ 0; SELL uses the opposite signs. A BUY trigger requires ROC > 0, and a SELL trigger requires ROC < 0. Equality cannot trigger either side.
Can I wait for price after the first recross fails?
No. The first recross is the sole candidate. If its completed candle fails the strict frozen price break, the episode is cancelled. A later price break is a new observation, not permission to revive the old trigger.
Is a close above the reset high independent confirmation?
It is an additional price condition, not independent information. Both ROC and the break derive from the same market prices. Their combined trading value must be measured after costs on data not used to choose the rules.
Are the period and risk limits recommended settings?
No. They make the educational example explicit and reproducible. They have not been optimized or validated for a broker, regime or live account. Planned risk and execution allowances do not cap every possible realized loss.
Has the example shown a winning trade?
No. The supplied sequence ends at the analytical trigger. The first quote illustrates an eligibility calculation, not a confirmed fill. No later price path, realized return or profitable exit is provided.
13. Technical reference and scope
The official MetaTrader 4 Momentum reference documents the ratio-based indicator. Our zero-centred ROC expression is its algebraic conversion with the same inputs. The prior leg, finite reset, price gate, exits and cost limits are our educational specification, not vendor-endorsed trading parameters.
Forex and leveraged trading involve substantial risk. This strategy is educational, not investment advice. Past or simulated results do not guarantee future performance.