

CCI measures deviation from an average; it does not identify an exchange-traded commodity or guarantee a reversal. This educational strategy combines an H4 range known in advance with a later H1 recovery and a separate price condition. Its reference is a fixed range midpoint, rather than the moving indicator zero line. Profitability and optimal parameters remain unproven.
1. Calculate CCI on the declared input
Use CCI(20) on ordinary H1 Bid candles with typical price TP = (High + Low + Close) / 3. For the current completed window, calculate its TP mean and the mean absolute deviation MD of those 20 TP values from that same mean. CCI = (TPcurrent − meanTP) / (0.015 × MD). Skip missing data and MD = 0.
CCI is unbounded; +100 and −100 are indicator levels, not percentages or probabilities. A reading outside them can accompany a sustained trend. The indicator updates on each completed H1 bar in this rule; it is not frozen with the price range. A plotted extreme alone never authorises an order.
TP = (H + L + C) / 3; MD = Σ|TP_i − meanTP| / 20; CCI = (TP_current − meanTP) / (0.015 × MD)2. Prepare both charts and separate their jobs
Open EURUSD H4 and H1 from the same feed and server clock, using ordinary Bid candles and pip size 0.0001. On H1, set Commodity Channel Index to period 20 and Typical Price, (H + L + C) / 3. A default period displayed by a platform is not permission to replace this period. Add −100, 0 and +100 as visual reference levels. The H4 chart supplies the frozen high–low range; H1 supplies the candidate, CCI recovery and price break.
M0 is the midpoint of the H4 high–low range. It is not the H1 typical-price average, the CCI zero line or a volume-weighted price. CCI can cross zero while price is still below M0, or the reverse, because those references use different inputs. For a separate arithmetic check, current TP 1.0910, mean TP 1.0922 and MD 0.0010 give (1.0910 − 1.0922) / (0.015 × 0.0010) = −80. This checks normalization; it does not derive the worked trade’s CCI from two candles.
3. Freeze the H4 range before candidate A starts
Before a prospective H1 A opens, take the most recent 20 fully completed H4 bars. Set L0 to their lowest low, U0 to their highest high, W = U0 − L0 and M0 = (L0 + U0) / 2. Require W > 0. Do not include the still-forming H4 bar, even if it finishes when A later closes.
On H4, also require ER20 ≤ 0.35 with a positive denominator: absolute net close change across 20 intervals divided by the sum of absolute interval changes, needing 21 completed closes. The gate measures prior path efficiency, not guaranteed stability. Freeze this snapshot through the candidate and trade. Only create candidates while flat; wait 20 completed H1 bars after A before rearming.
See the related multi-timeframe strategy for another example of higher-timeframe timing.
ER20 = |C[t] − C[t−20]| / Σ(k=t−19…t)|C[k] − C[k−1]| ≤ 0.35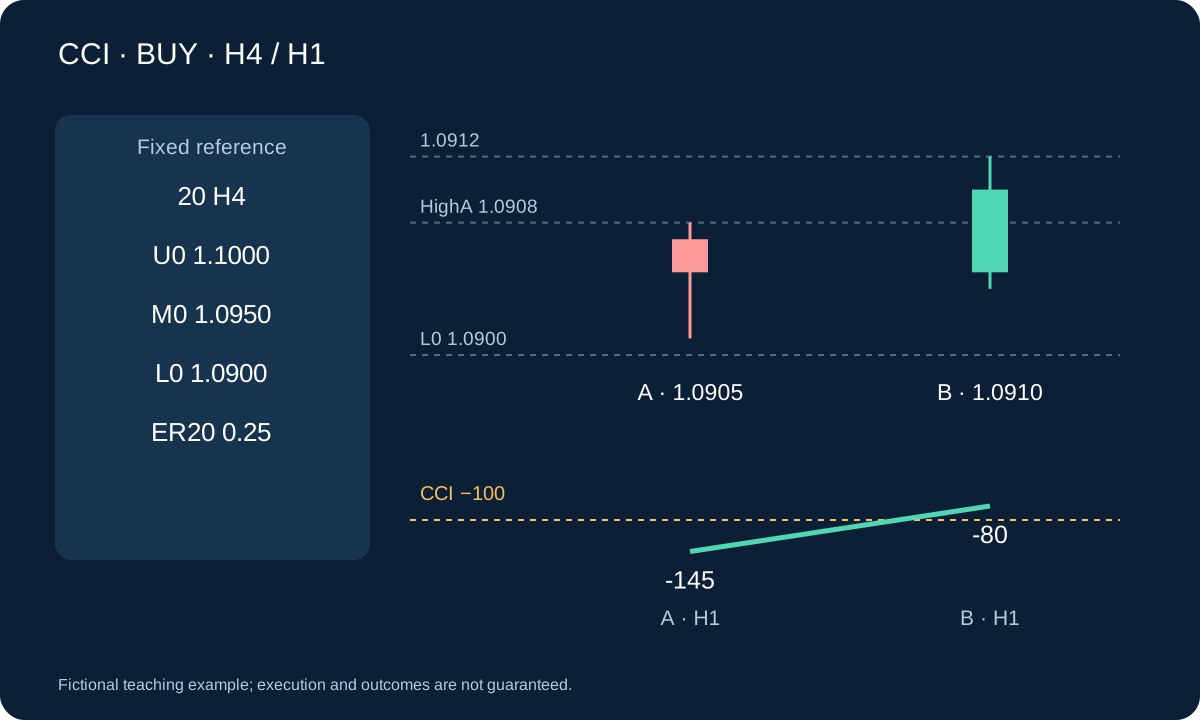
4. Audit the H4 snapshot with actual timestamps
Suppose the broker’s H4 bars open at 00:00, 04:00, 08:00 and 12:00. For H1 A opening at 09:00, the latest completed H4 bar is 04:00–08:00. The 08:00–12:00 bar is excluded. Its eventual high or low is not known at 09:00. The same exclusion applies to A opening at 11:00 even though that H4 bar will finish when A closes at 12:00. Save the exact last included H4 closing time.
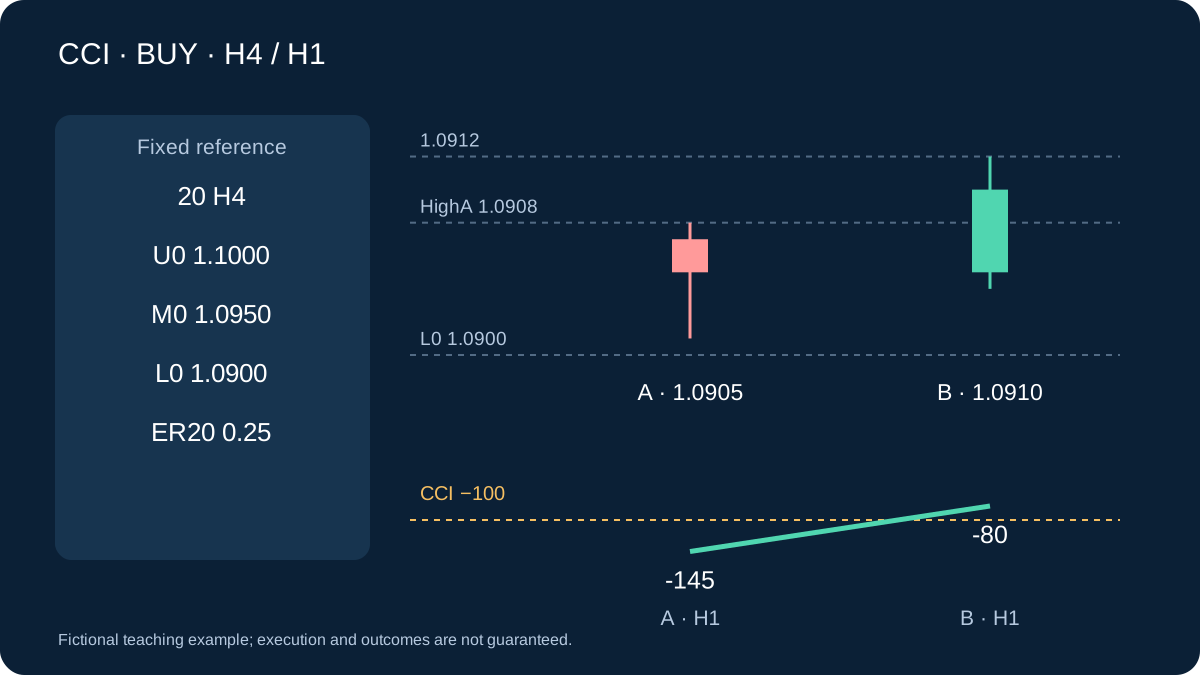
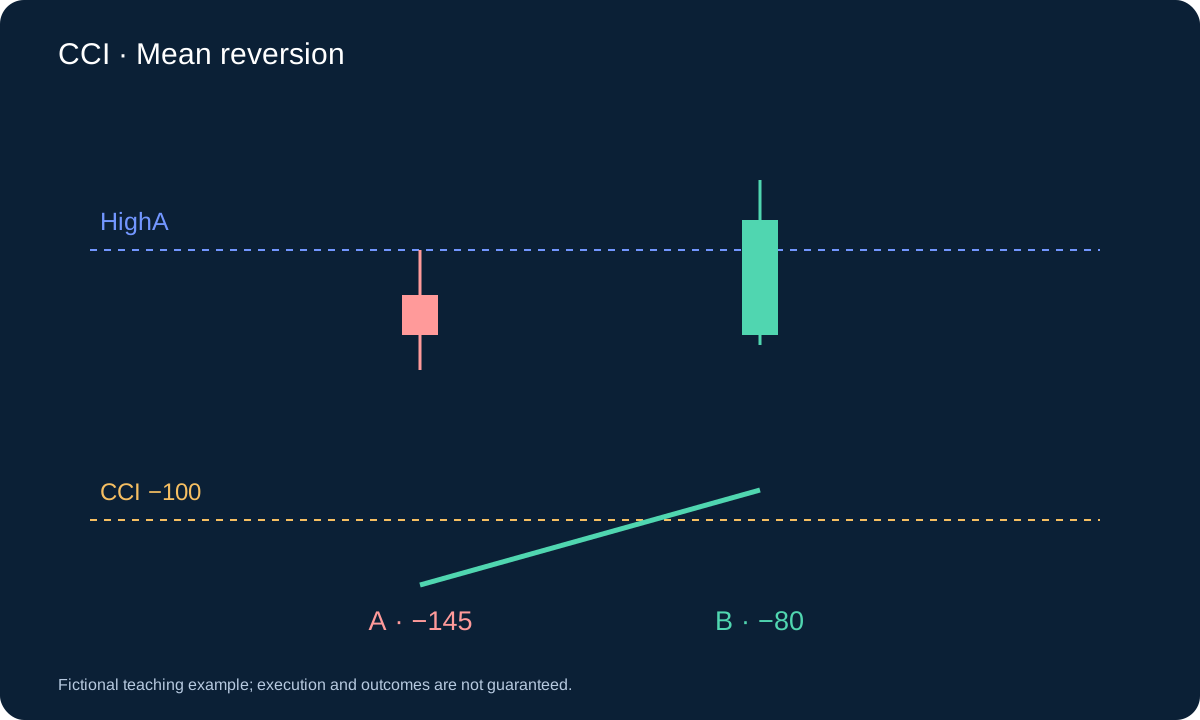
For a BUY A with CCI −145, an A+1 reading −110 is not a recovery; A+2 at −90 is the first recovery. Check its price conditions then. If it fails to close above HighA, terminate; an attractive A+3 cannot repair that first crossing. Process an outside-range close before confirmation. No recovery through A+3 means expiry. A later wick outside alone is allowed by the waiting rule, but a server stop remains independently active after entry.
5. BUY: lower-quarter location and first CCI recovery
A must have CCI < −100, its entire high–low range inside [L0, U0], and its close in the inclusive lower quarter [L0, L0 + 0.25W]. Then wait at most three later H1 bars. The first crossing from CCI ≤ −100 to CCI > −100 is the only possible confirmation B.
At that first crossing, require a bullish B, CloseB > HighA and CloseB < M0. If any price condition fails, terminate the candidate rather than waiting for another crossing. Any completed H1 close outside [L0, U0] while waiting cancels it before entry. If no crossing appears by the third later bar, it expires. A wick outside on a later waiting bar alone is not this close-based cancellation.
6. SELL mirrors the location and timing
For SELL, A needs CCI > +100, its full range inside [L0, U0] and close in the inclusive upper quarter [U0 − 0.25W, U0]. Within the next three H1 bars, the first crossing from CCI ≥ +100 to CCI < +100 is B. Require bearish B, CloseB < LowA and CloseB > M0.
The same cancellation, first-crossing failure and expiry apply. This is price confirmation after indicator recovery, not divergence detection or a trade at A. Higher-timeframe boundaries are chosen before A; neither the later confirmation nor a future range extension can revise them.
7. Worked SELL at the upper quarter
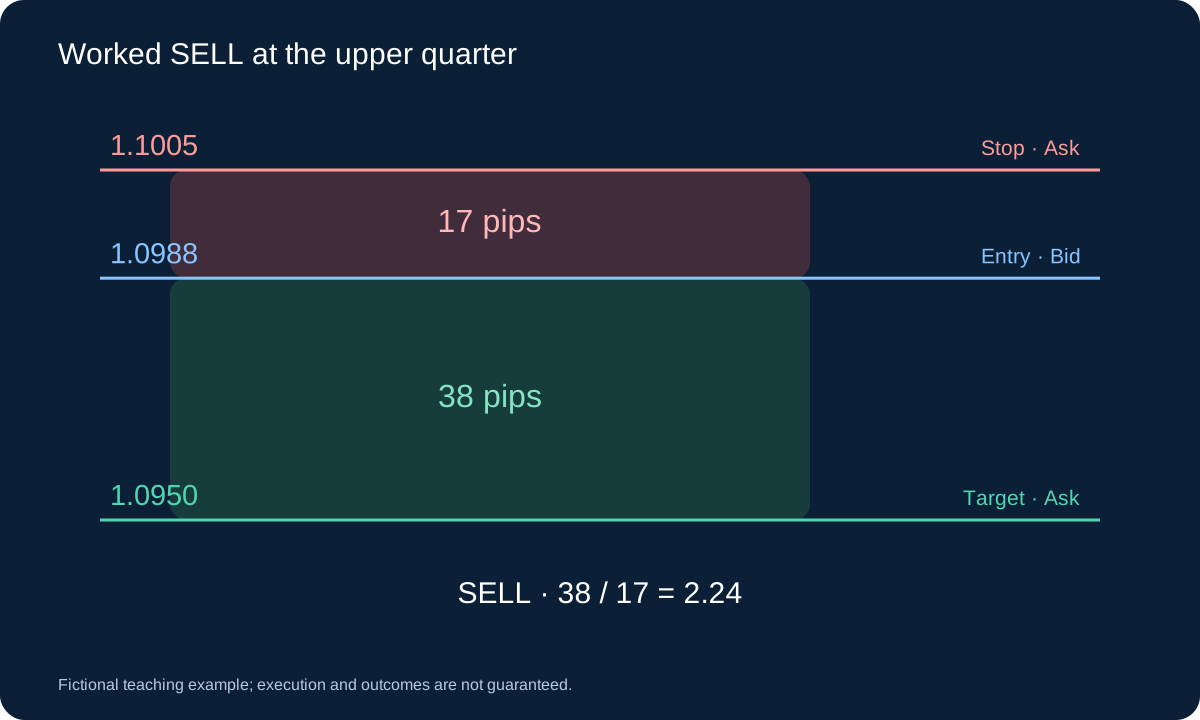
Keep L0 1.0900, U0 1.1000, W 0.0100, M0 1.0950 and prior H4 ER20 0.25. A has high 1.0999, low 1.0992, close 1.0995 and assumed CCI +145. Its full range is inside and its close lies in the upper quarter. The next B opens 1.0995, closes 1.0990 and has assumed CCI +80. It is the first downward recovery, bearish, below LowA and above M0.
First Bid/Ask 1.0988/1.0990 gives SELL entry 1.0988, Ask stop 1.1005 and Ask target 1.0950. Risk is 17 pips, target room 38, ratio ≈ 2.24 and spread share 2/17 ≈ 11.8%. Under the BUY’s cost assumptions, 0.25 lots estimates loss USD 49.25 and net exact-target gain USD 93.25 before other charges. The CCI readings are assumed for teaching; verify all 20 typical prices in an implementation. A Bid target touch alone cannot establish a SELL exit.
8. Check the first quote and install fixed exits
After B closes, evaluate only the first available quote. BUY enters at Ask, SELL at Bid. Set BUY stop L0 − 0.05W, SELL stop U0 + 0.05W, and target M0. BUY exits are Bid-based; SELL exits are Ask-based, although the chart range was measured from Bid bars.
Require positive executable stop distance and target room, spread ≤ 15% of that stop distance and gross target room ≥ 1.20 times it. If any gate fails, skip this candidate without waiting for another price. Size within the chosen loss budget including costs, round down to the lot step, and verify margin, tick alignment, distance rules and server acceptance.
BUY: SL = L0 − 0.05W; SELL: SL = U0 + 0.05W; TP = M09. Use a midpoint target and explicit invalidation
Keep the original stop and midpoint target unchanged, with no averaging, added entry, trailing or break-even move. After entry, a completed H1 close outside [L0, U0] requests a full exit at the next available quote if still open. A wick alone is not this rule, while an accepted server stop can trigger intrabar.
Otherwise close any remainder at the first quote after eight complete H1 holding bars; the entry bar is 1. Record the actual first exit and its reason. The local close-based and time exits require a running system and execution availability. None guarantees a price, and gaps can exceed the intended loss estimate.
10. Resolve the edge cases before coding
| Observation | Action | What the rule requires |
|---|---|---|
| A CCI = −100 | No BUY candidate | A CCI must be strictly lower |
| A low = L0 | May pass location | Full A range may touch the boundary |
| B CCI = −100 | Still waiting | Recovery must finish above −100 |
| B close = HighA | First recovery fails | Price break is strict |
| Waiting close = L0 | Not an outside close | Boundary equality stays inside |
| Waiting close < L0 | Cancel first | Do not confirm on this bar |
The third waiting bar can confirm if its first crossing and price conditions pass. A candidate is not entitled to three new chances after a failed cross. The cooldown counts A+1 through A+20; a fresh A starts no earlier than A+21, while flat and without another candidate. Keep existing-candidate processing ahead of fresh detection on the same bar.
11. Worked BUY with costs and a fixed denominator
Assume L0 1.0900, U0 1.1000, W 0.0100, M0 1.0950 and H4 ER20 0.25. A has high 1.0908, low 1.0901, close 1.0905 and assumed CCI −145. The next B is bullish, closes 1.0910 and has assumed CCI −80, so the first recovery and price break pass. These indicator readings are teaching assumptions, not values derived from only two candles.
First Bid/Ask 1.0910/1.0912 gives stop 1.0895, risk 17 pips and target room 38 pips: ratio about 2.24; spread 2/17 ≈ 11.8%. With USD 10 per pip per lot, USD 7 round-trip commission and 2-pip adverse stop allowance, estimated loss is USD 197 per lot. A USD 50 budget and 0.01 step allow 0.25 lots, estimating USD 49.25 loss. An exact target gives USD 93.25 net before swap or other charges.
loss_per_lot = 17 × 10 + 7 + 2 × 10 = 197 USD; 0.25 × 197 = 49.25 USD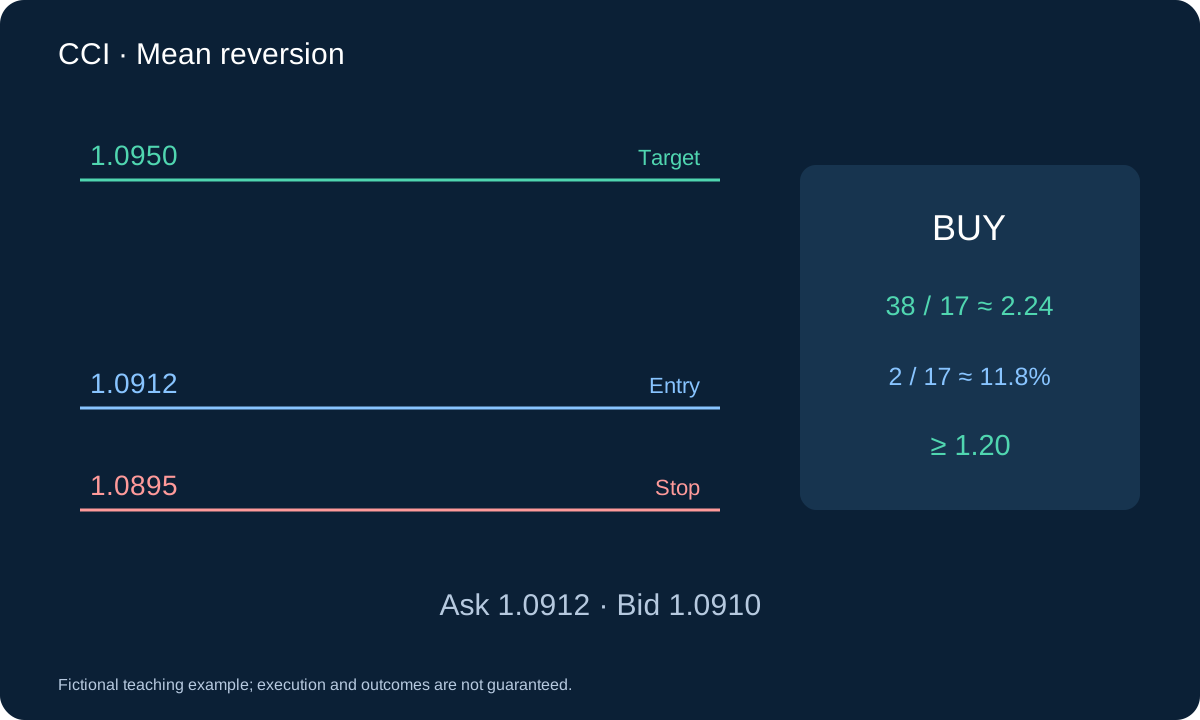
12. Validate the range hypothesis and its failures
A historical range may be the pause before a trend. CCI can recover while price continues down, and three bars may expire before a real turn. Report cancellations, rejected first crosses, quote failures, missing inputs and time exits, not just trades that reach M0. Do not widen the range after observing a losing move.
Test chronological training and untouched validation with correct H4/H1 timestamps, Bid/Ask fills, spread, commission and financing. Audit which H4 bars were complete at A’s opening time. Resolve intrabar stop/target ambiguity using suitable ticks or a stated conservative method. Compare net expectancy, drawdown, tails and parameter sensitivity, then forward-test the frozen specification.
13. Turn the specification into an auditable test
At each prospective A opening, retain the last 20 closed H4 bars, the 21 H4 closes needed by ER and enough H1 data for CCI. Do not fabricate a missing H4 candle from a differently aligned four-hour aggregation. Missing or nonconsecutive required bars cancel a waiting candidate; restart only with a complete new window. An existing position instead requires reconciliation of accepted protection and overdue local exit instructions at the next available quote.
For example, an entry in the first quote of 13:00–14:00 makes that H1 bar count 1; bar 8 finishes at 21:00. The following quote requests the time exit if still open. If a server exit already occurred, use its real account record rather than adding a second hypothetical exit. Log snapshot times, first-cross consumption and actual fills. Compare range breaks, time exits, costs, losses and missed candidates on chronological untouched validation, not only trades that returned to M0.
Questions
Can I use the H4 candle containing A?
Only if it was already complete before A opened, which the containing candle was not. This strategy deliberately excludes it. Using its later final high or low would introduce information unavailable at the decision snapshot.
Does CCI crossing −100 upward mean the trade will win?
No. It is one gate. The fixed range, location, first recovery, price confirmation and executable economics must all pass. The combined rule still needs independent validation.
Sources and scope
CQG documents the normalized deviation formula and MetaQuotes the iCCI input options. The H4 snapshot, efficiency gate, three-bar policy, price confirmation and exits are our research specification. Prices and readings are fictional; no backtested performance is presented.
Fictional teaching example; execution and outcomes are not guaranteed.